
The Story of a Tapestry
Walk with me process of designing and weaving a winter landscape tapestry for an upcoming group show in December. The show is called “Winter Quietude,” and the pieces are meant to be winter themed.
Design and Color Palette
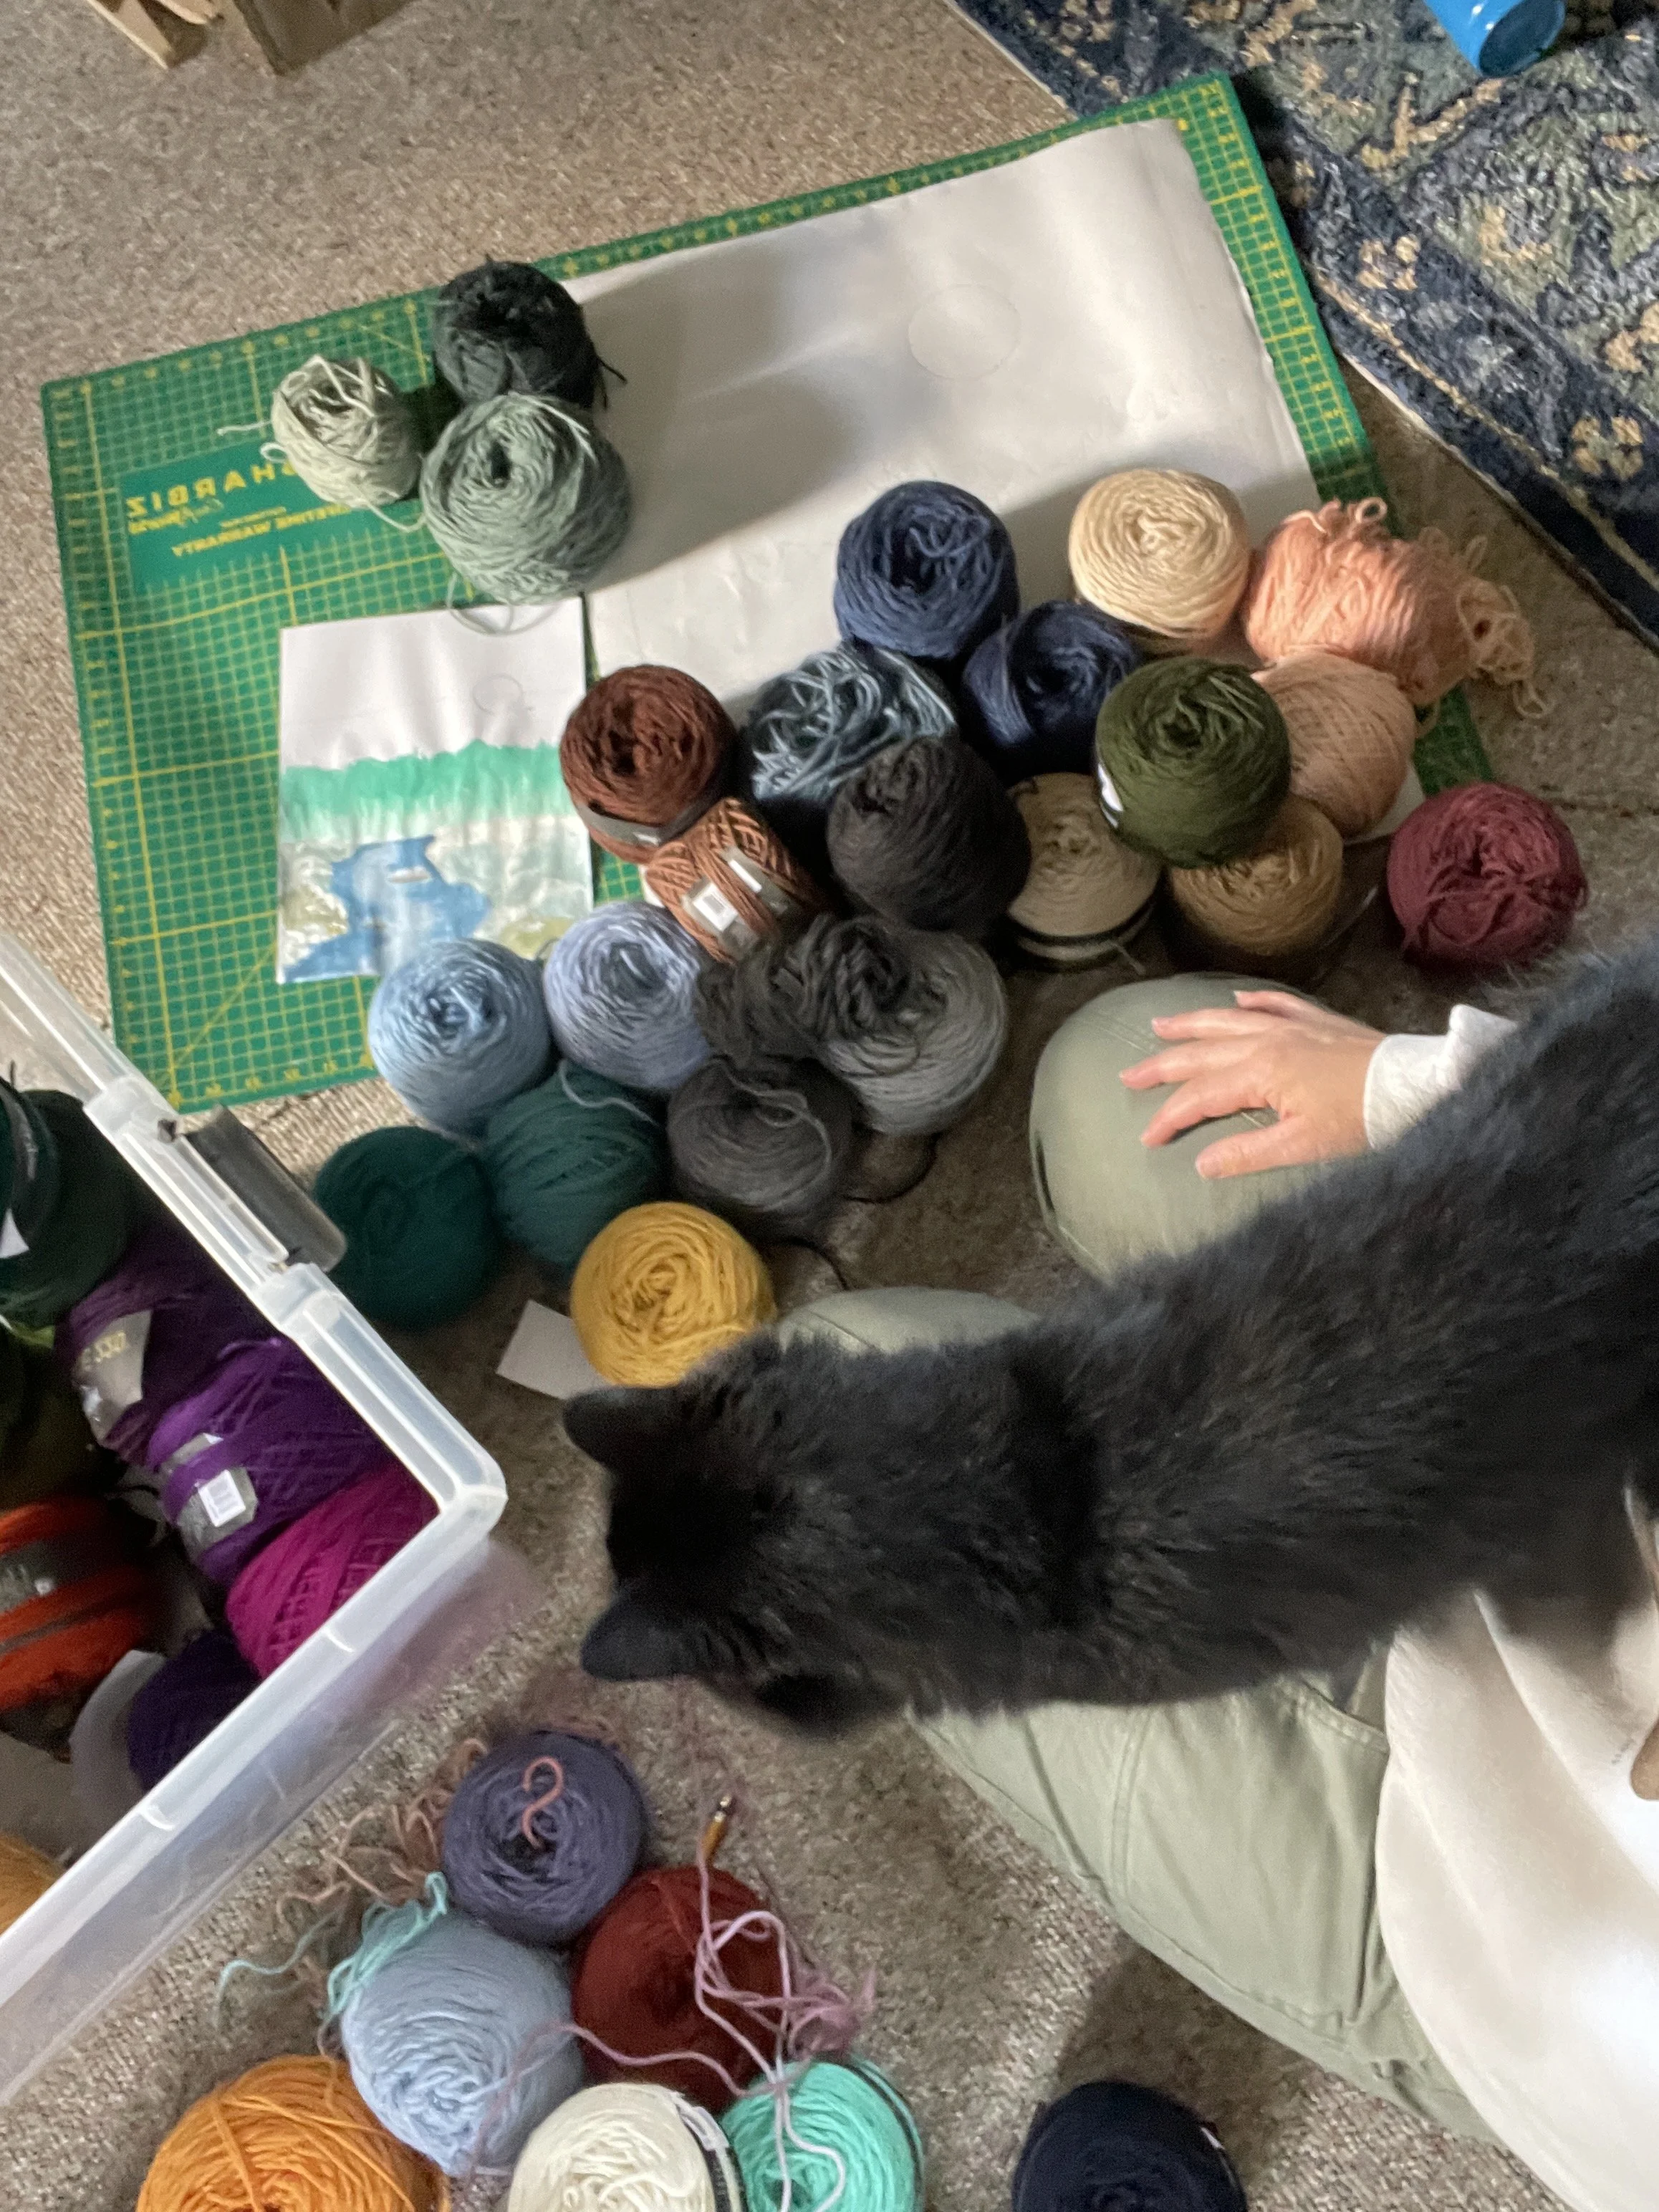
drawing the cartoon + choosing yarn with Aurora's help
I have woven smaller versions of this snowy river scene, and I wanted to try it again at a large scale. First I paint a little gauche sketch, then translate a version of it onto a piece of paper that was to scale (20 by 24-ish inches).
Next I pull out a big bin of Cascade 220 worsted wool yarn. I actually wouldn’t recommend this yarn for tapestry—it’s a bit too lofty—but I have a lot of it and have learned how to work with it. The color range is fantastic. I select out a bunch of colors that generally fit a palette I have in mind, then slowly whittle them away based on feeling.
Setting Up the Loom
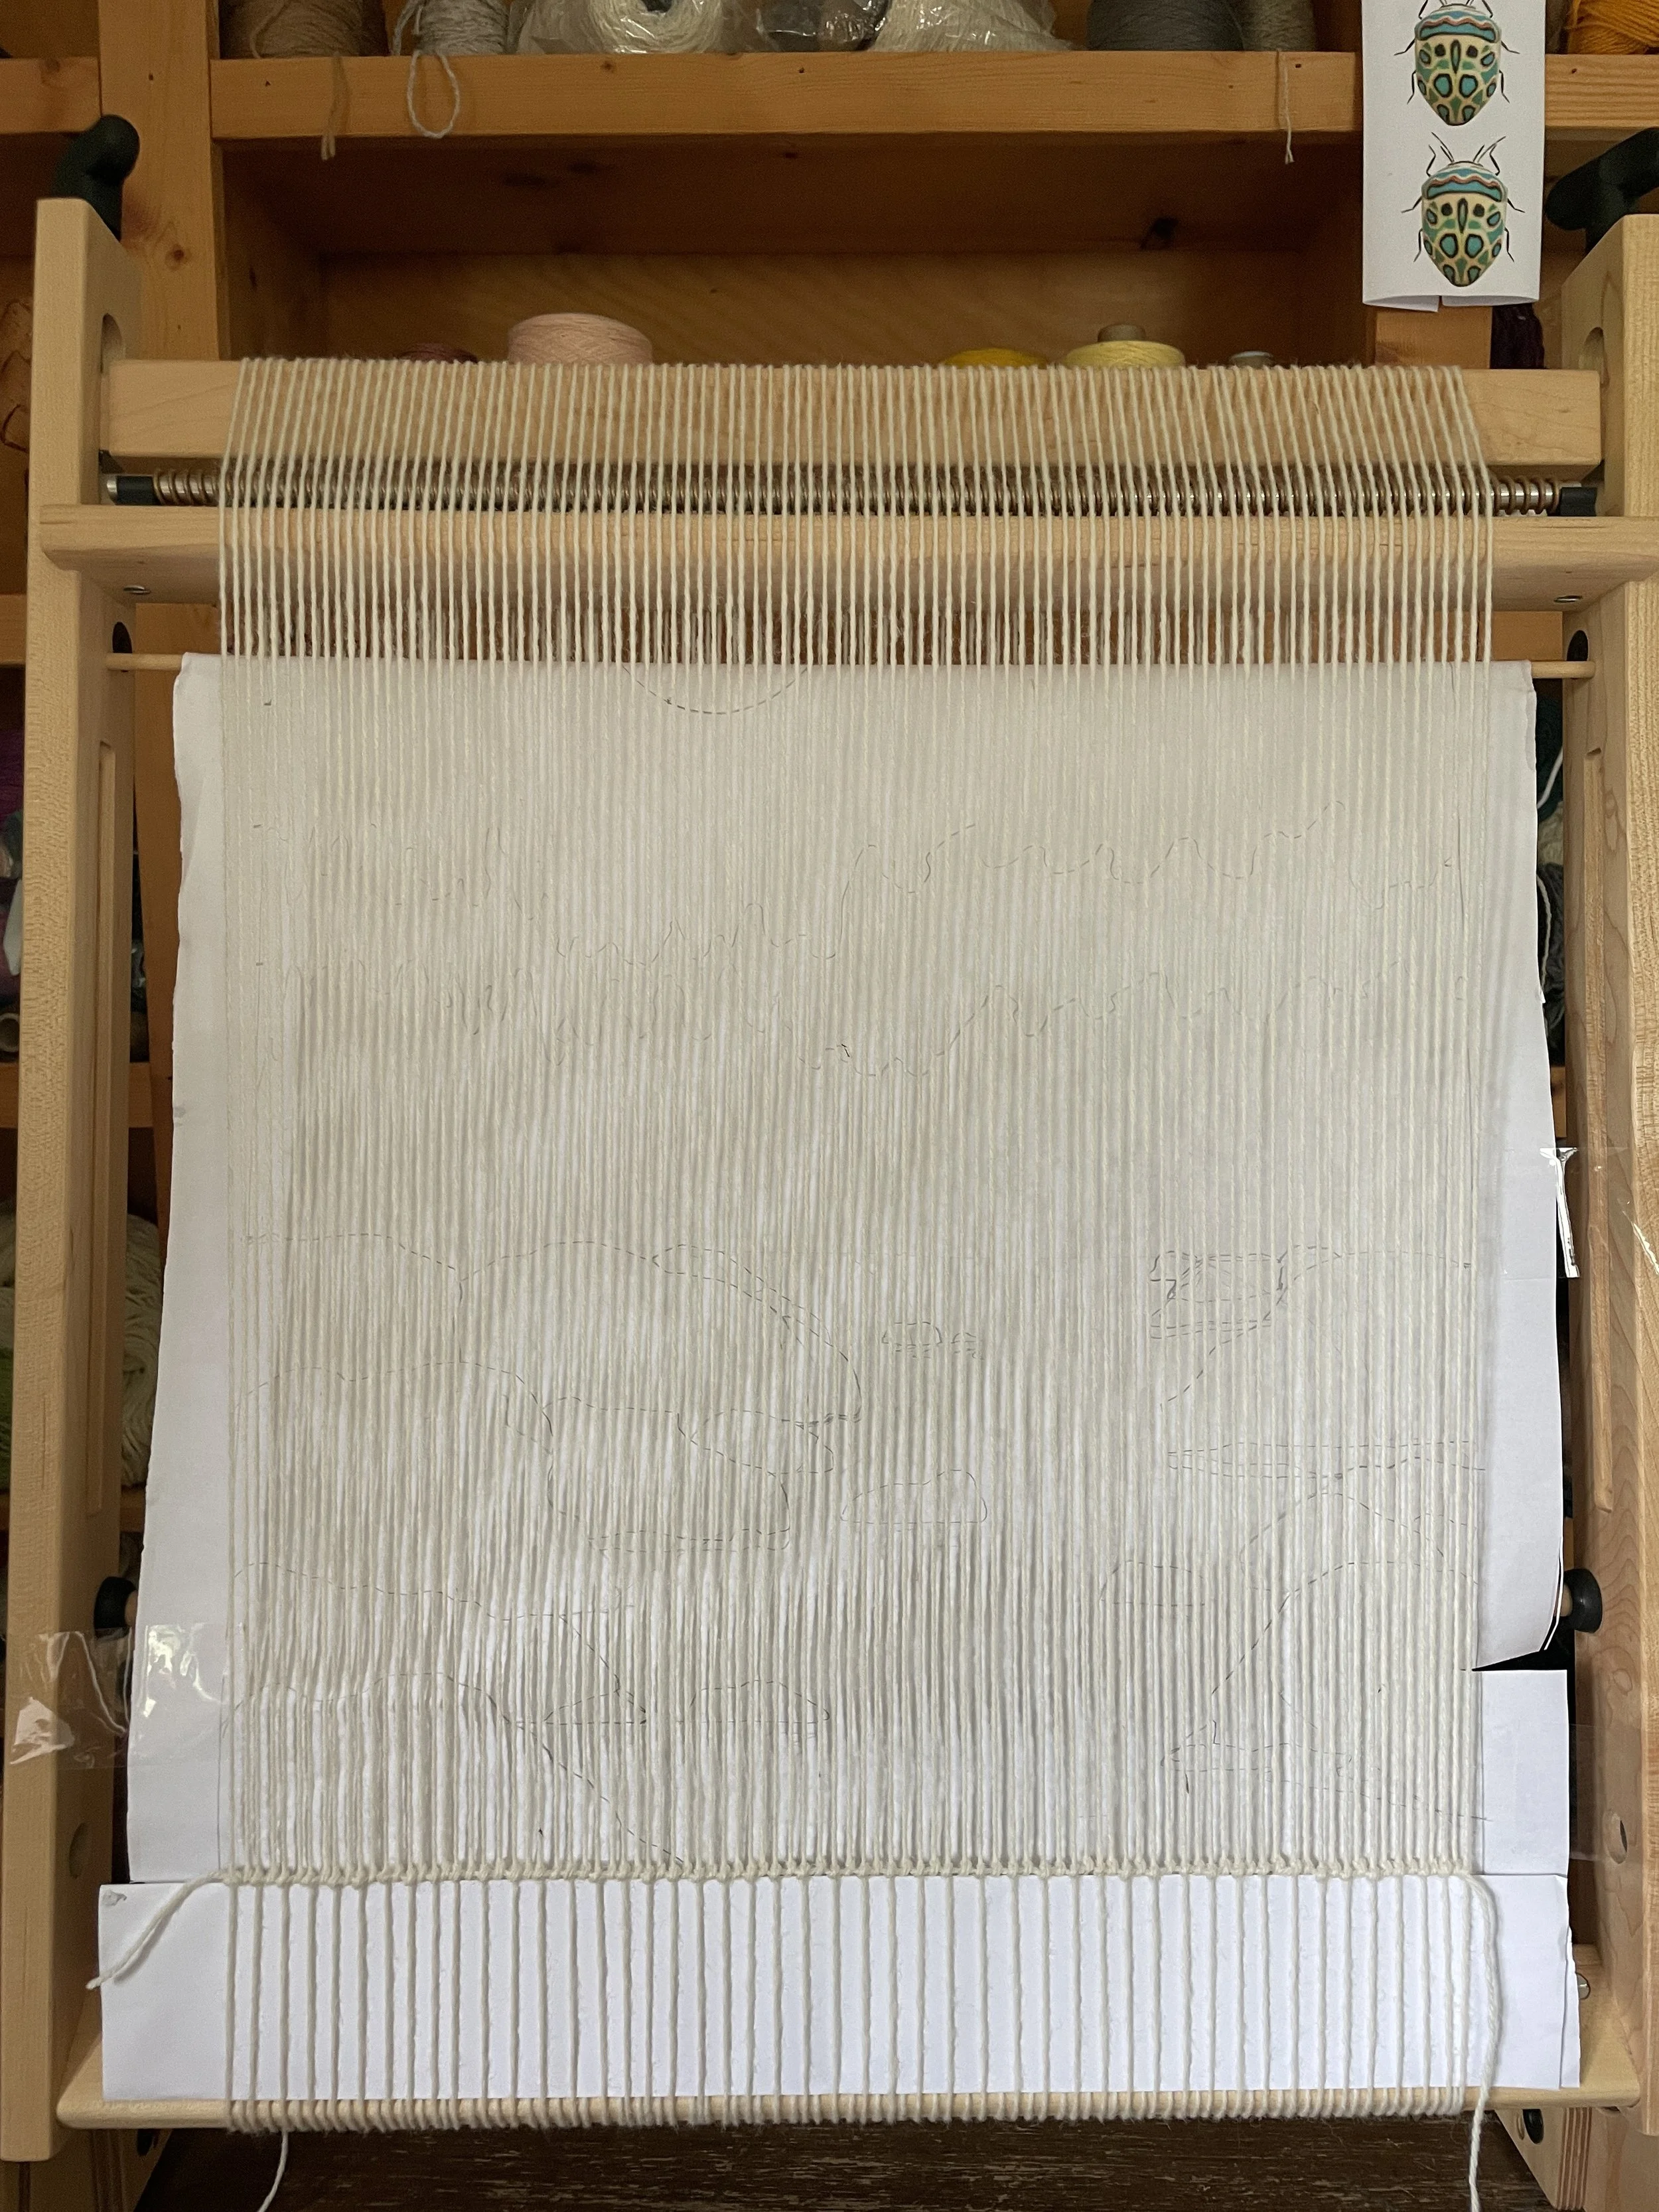
the cartoon attached behind the warp strings of my Arras tapestry loom
I choose a sett (the number of warp ends per inch) and warp my loom with wool string. The warp is the string stretched vertically from top to bottom, and is the foundation upon which a tapestry is built. I tie a row of half-hitch knots to secure the bottom edge, and attach the cartoon image behind the warp strings to use as a guide.
Weaving Begins

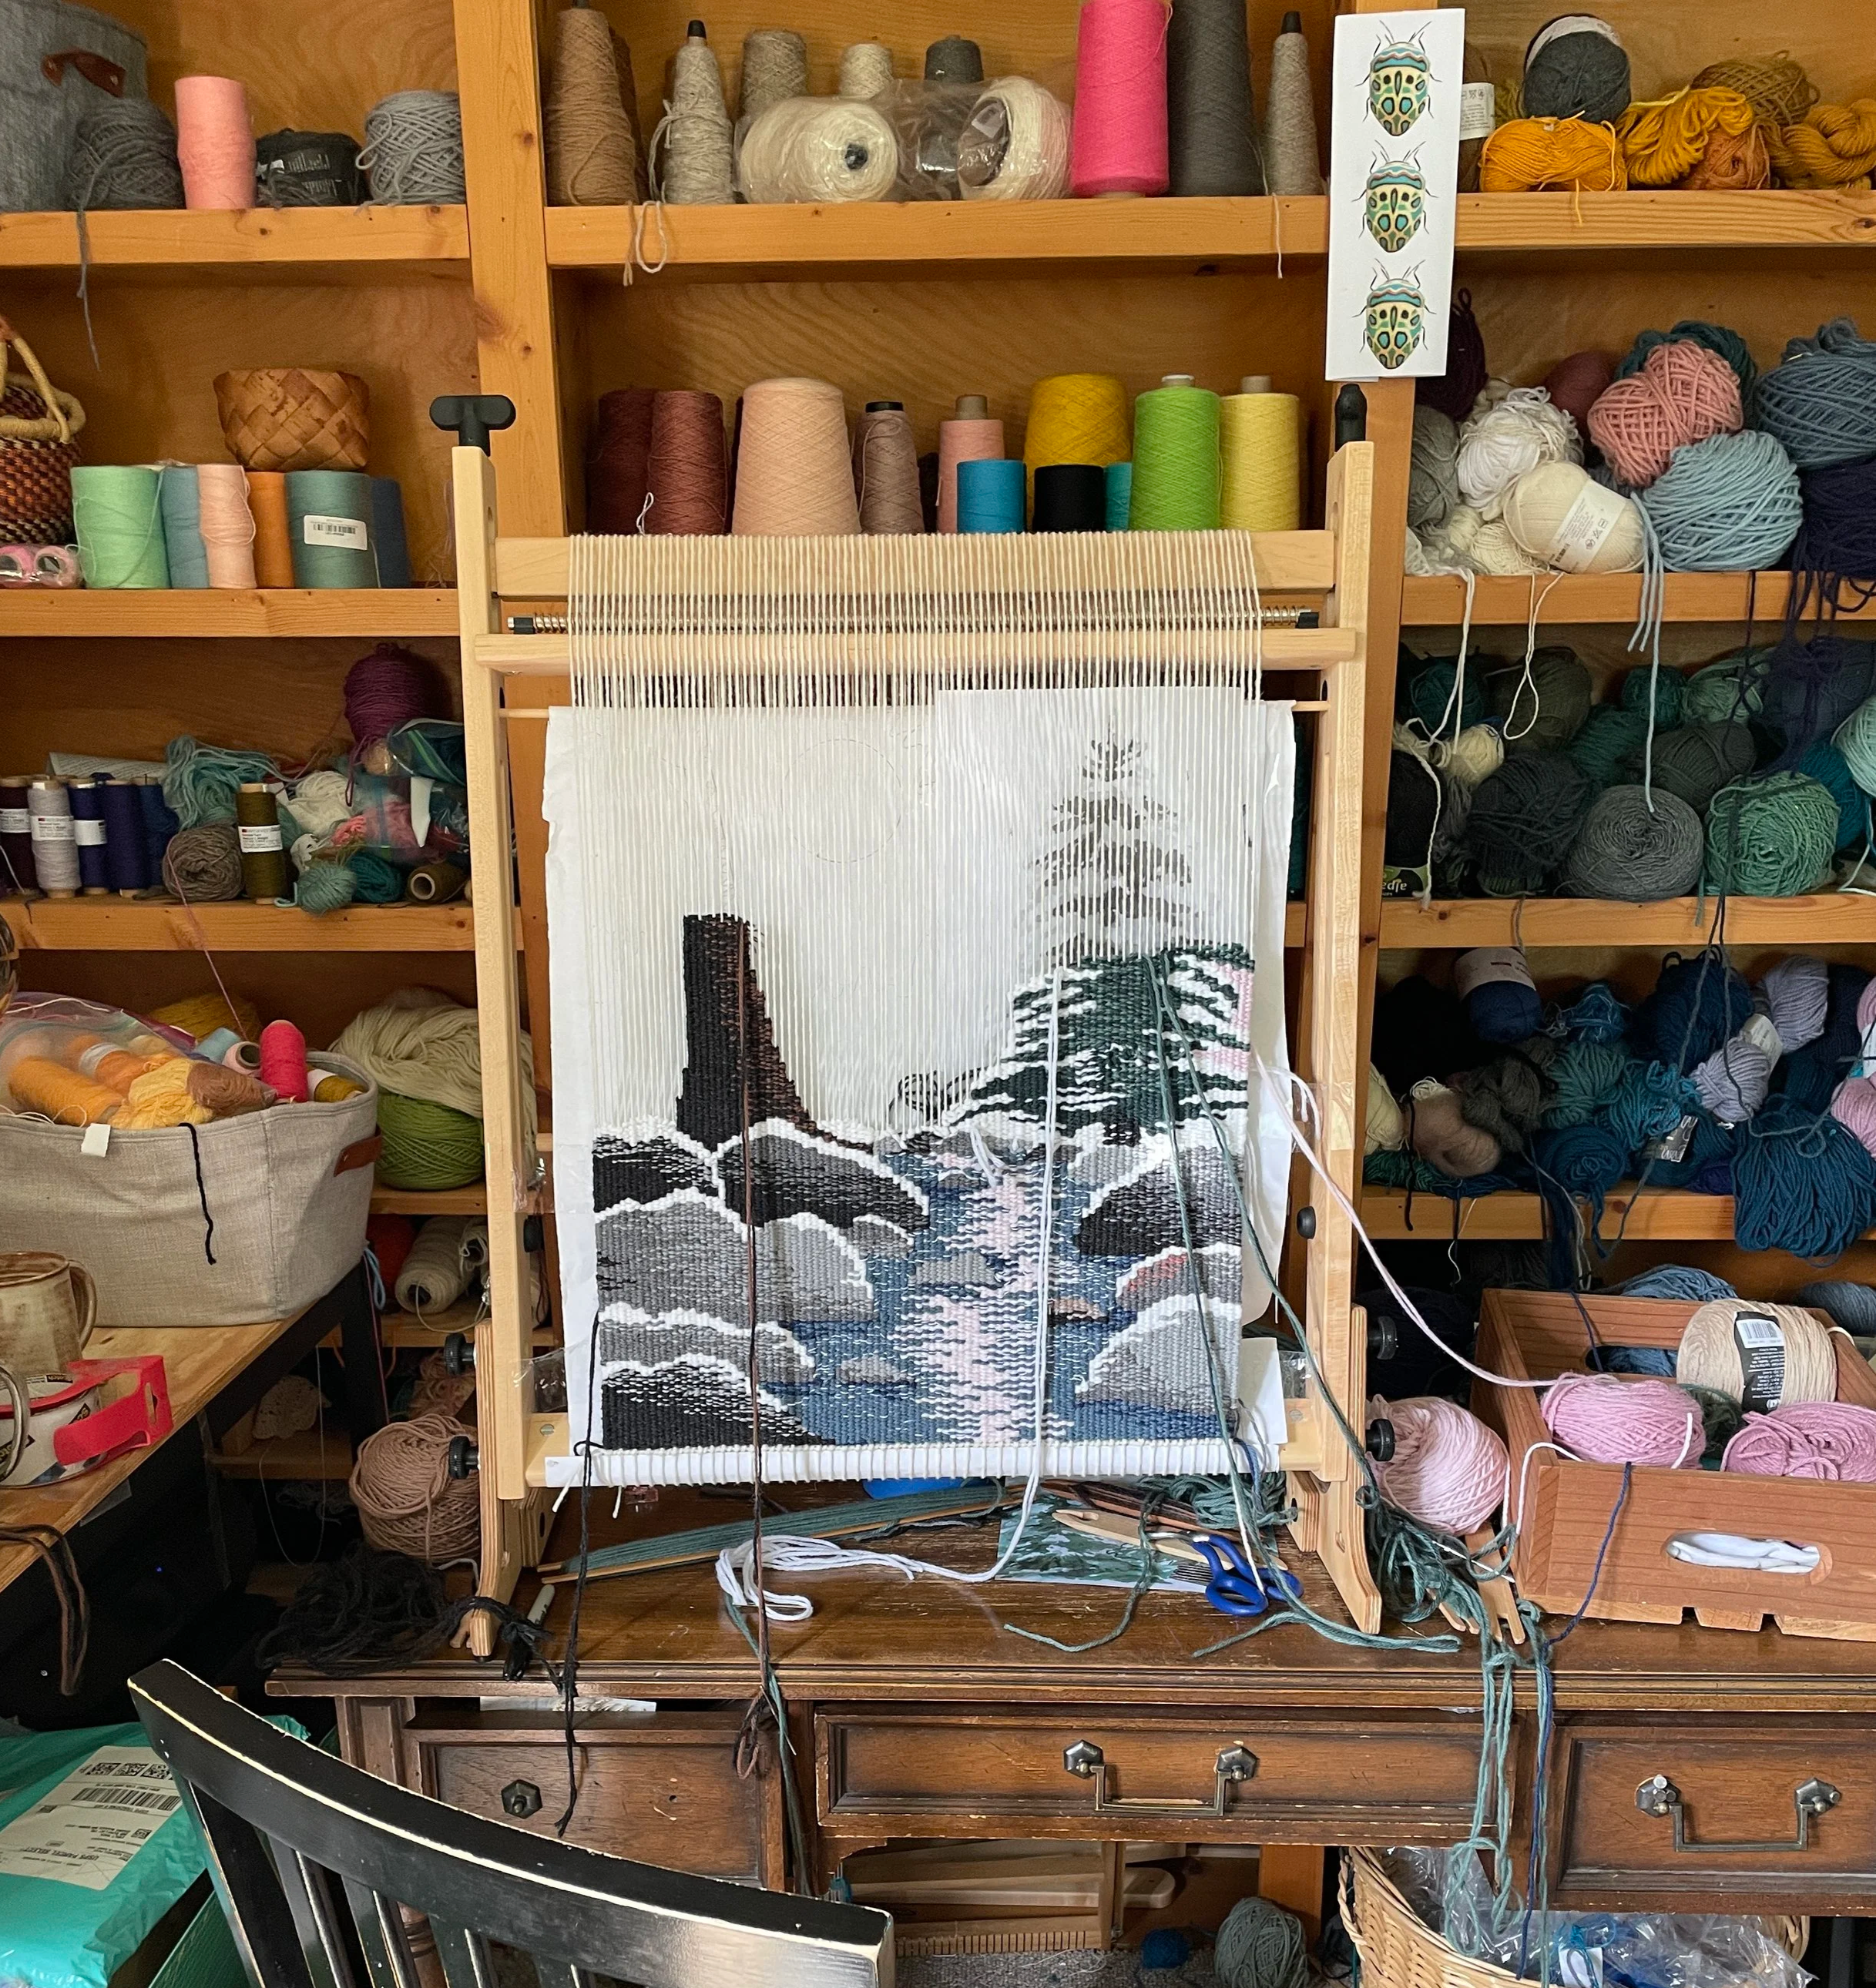
A tapestry grows from the bottom up. The colorful yarn creating the picture—called the weft—is packed down until it covers the warp. Several wefts are in play at the same time. You can see in the picture on the right that six wefts are dangling down in front of the loom—I am keeping track of all of those at once, and moving them in tandem to create the design.
As I weave, it is late August. I take a break to swim in Lake Superior with friends, and bring the loom outside while the sun is warm.
The First Sticking Point

I reach the end of the river/rock portion of the weaving. I am happy with it so far. Later I’ll go back and add more snow to the rocks (I was told the white looked more like light reflection, and the rocks needed more white for them to look snow-covered).
At this point, I realize that the amount of detail I applied to the rocks must now be applied to the rest of the design. Initially, I planned on a distant tree line with a juicy full moon overhead. But as I begin to weave the green base of the tree line (right photo), I don’t like how stale it looks. At the same time, I am resistant to weaving a forest full of individual trees, knowing how long it would take.
I take a night to think about it. A friend comes over for dinner and suggests that a couple of big tree trunks in the foreground could align with the scale/detail of the river. I re-sketch the cartoon and decide it is a good new direction to take.
Adding Trees
I have another few false starts with the trees. First, I shift from the idea of two or three bare trunks to one bare trunk (a red pine trunk, to me) and a more full-branched evergreen, like a balsam or spruce tree. I find a stock photo to help guide the overall shape and translate what snow actually looks like on evergreen boughs. However, I have a hell of a time getting the snow to look right.
I struggle with the snow-covered branches. I weave an inch or two, then tear it out, knowing something isn’t right.
There is this internal debate when you’ve put hours into weaving something that isn’t working: to just accept it and move on, or to take the time to redo it until you’re satisfied. I couldn’t rest if one of the focal points of this piece didn’t look right. It is very frustrating to keep weaving, then unweaving, then weaving again, and to still hate it every time. But I keep going, hoping something will click eventually.
I try weaving the tree bare of snow to get the structure down. Finally I have a shape I like!
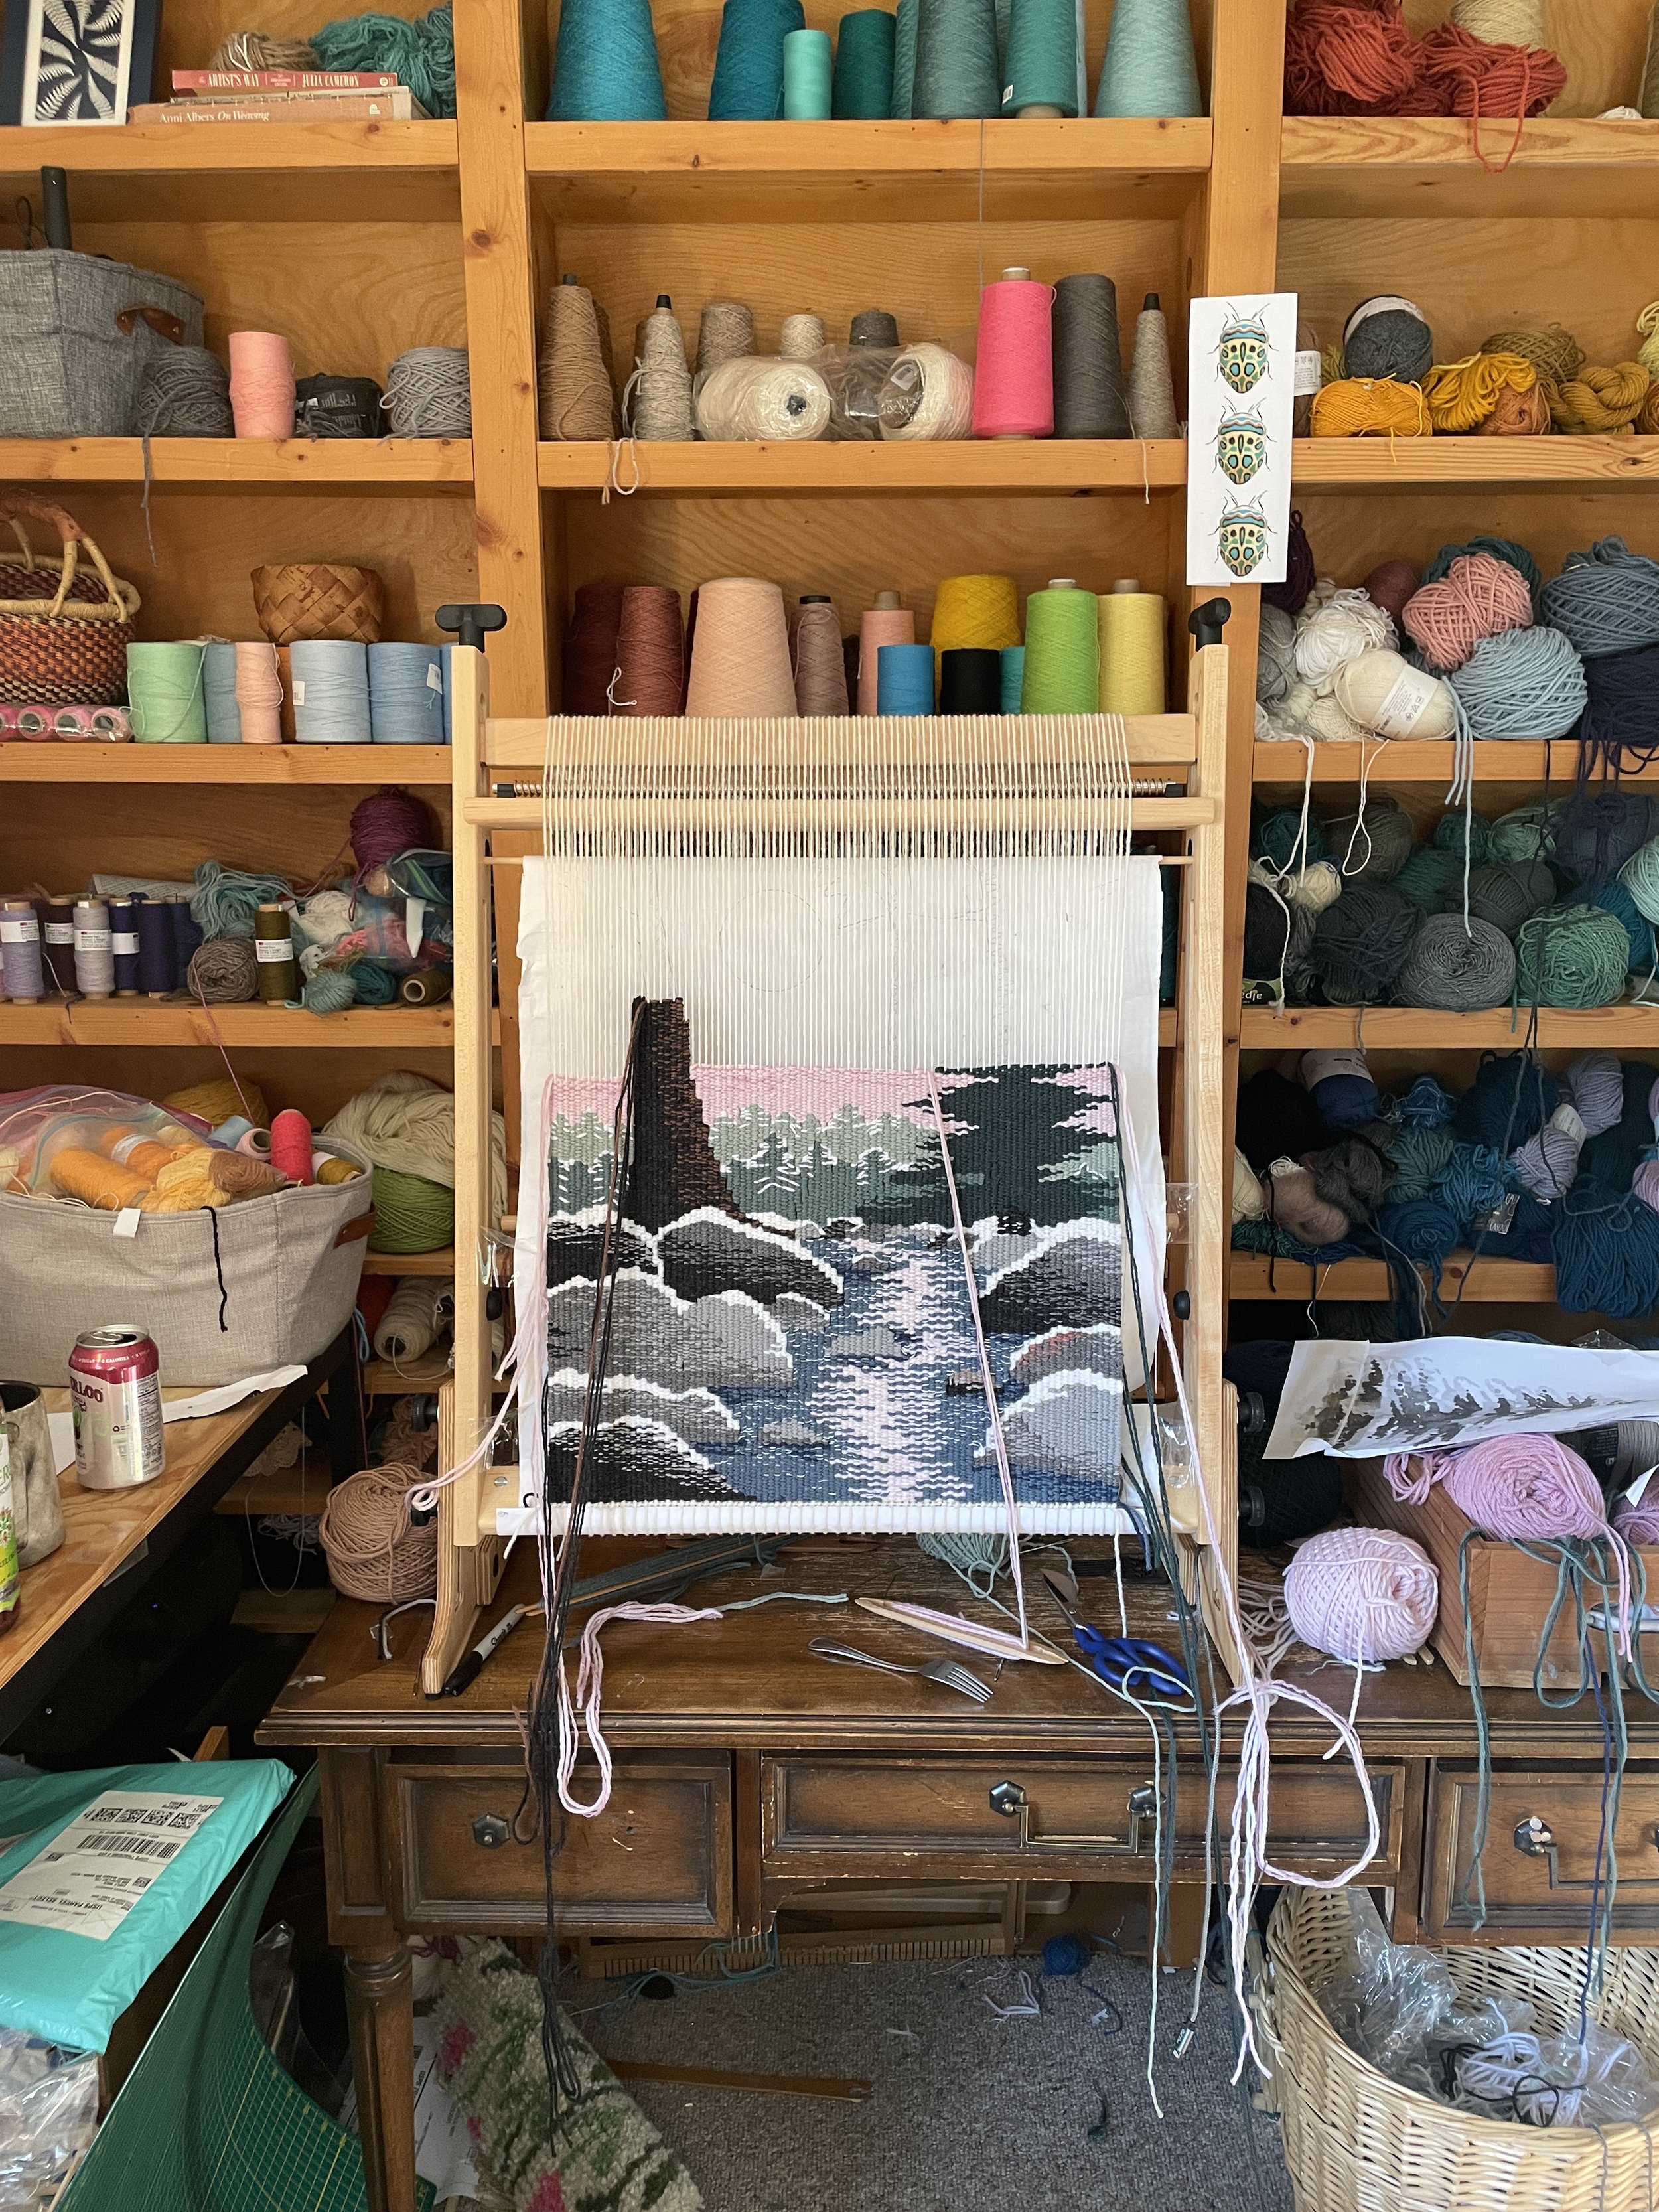
As you can see, I am also filling in the tree line and sky in the background. The balsam boughs interlace with that part of the design, and they both must build upon each other. Thus I couldn’t work that tree all the way up without filling in around it with the forest in the distance.
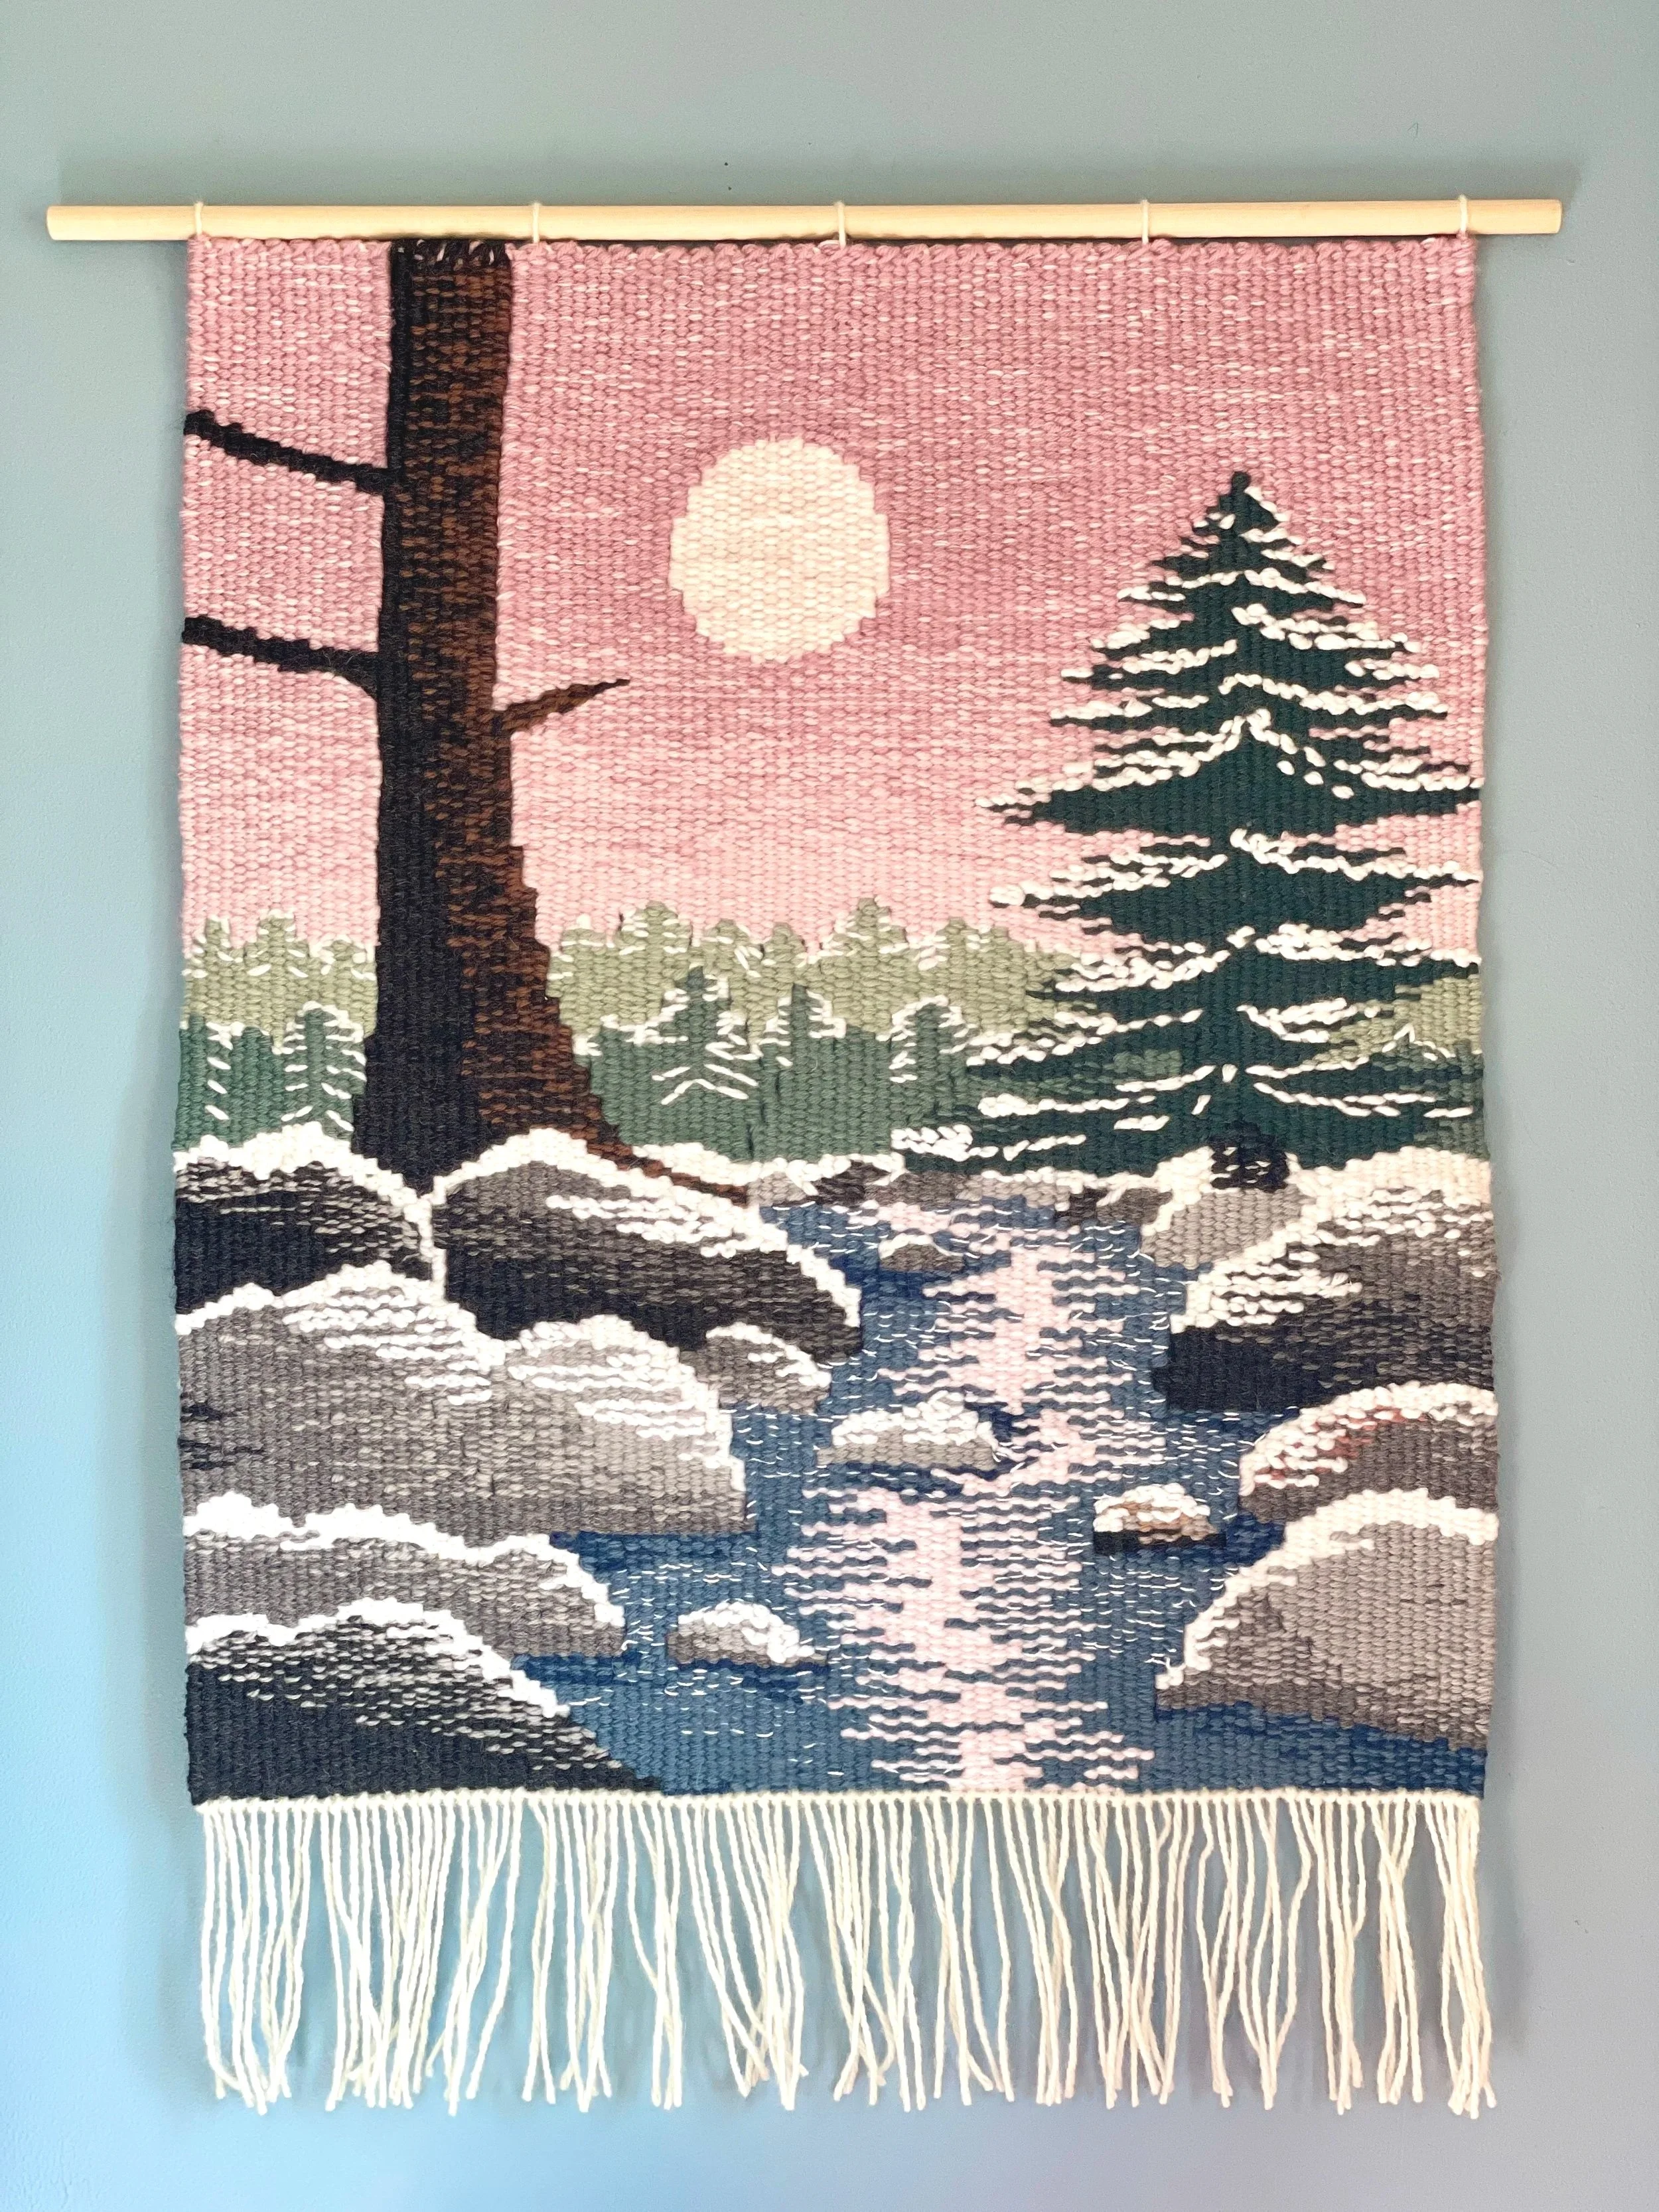
I always knew I wanted this weaving to have a fantasy pink-gradient sky, and I love how the colors turn out.
Adding Detail

Observe the snow growing up the tree as I embroider in white wool until it is snow-covered. Though it doesn’t appear in these pictures, I add more snow to the rocks too. I debate putting snow on the branches of the red pine, but ultimately decide not to. I wanted the starkness of that tree to stand out, so in my imagination, there is a canopy of big, beautiful branches above that blocked the snow from settling on its lower branches.
Finishing
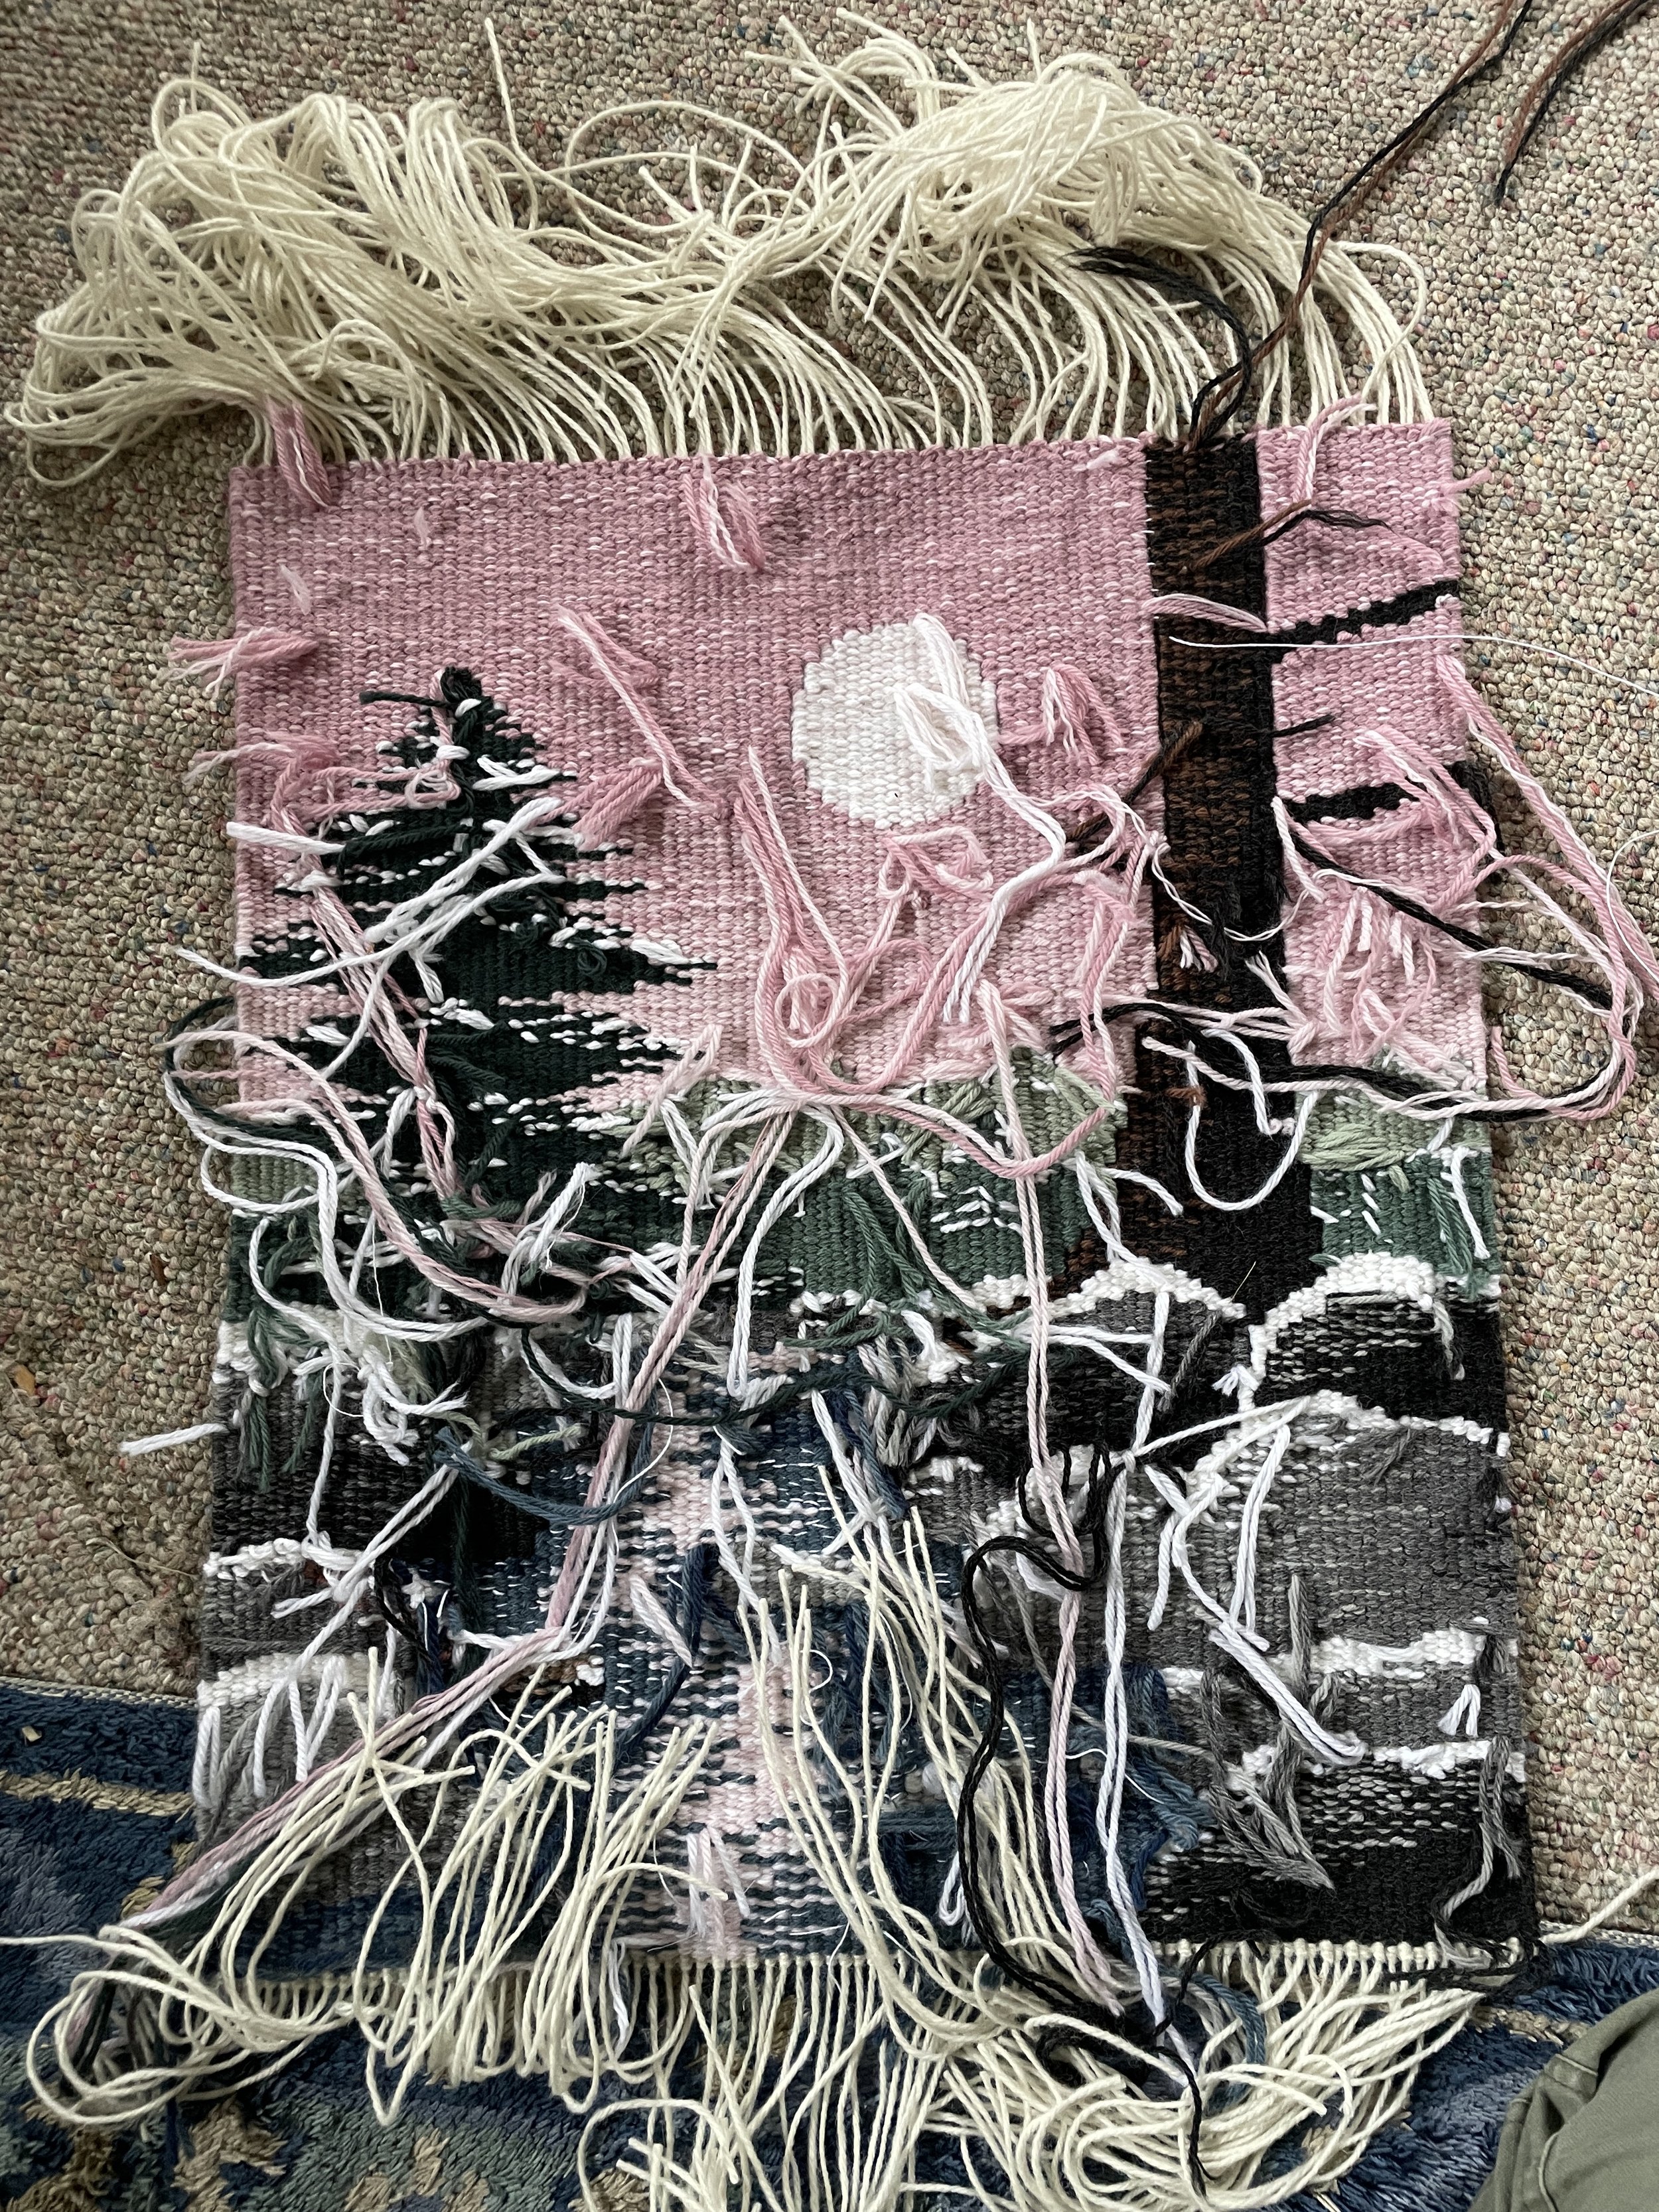
we call this the “dark side of the loom”
When the weaving is done, there is still a lot of work to do. The back of the piece is a mess of tangled wefts that must be woven into the back and hidden. I like to do this work either outside on a nice day or in the evenings watching a show. The bottom warps are cut to create a fringe, and the top warps are sewn down into the rows of the weaving. I use a few to create loops that hang over a dowel that will be used to mount the piece on the wall.
The Finished Tapestry
I often get asked how long a piece takes. It’s so hard to say. Even with this project, where I have more pictures of the process than normal to go back and look at timestamps on, it’s very hard to say in hours how long a tapestry like this takes. The false starts, un-weaving, and re-weaving are all important parts of my creative process that are included in that time. It was on my loom from August 21 - September 3.